
Page 1 of 4
Tips for Preparing Images and Landscape Tables
including Page Number & Portrait Mode Requirements for
the Submission of a Dissertation
This guide is based on using Microsoft Office 2019.
Gridlines
Displaying gridlines in Microsoft Word assist in the appropriate placement of content. Select
View > Gridlines to center images and adjust the size and placement of tables. Note: If gridlines
do not display, follow this post: https://answers.microsoft.com/en-
us/msoffice/forum/msoffice_word-mso_win10-mso_o365b/bug-in-word-2016-gridlines-
sometimes-wont-show/07d95cdd-5eca-4f6e-8419-e8346fd06880
Images
Images may be rotated and resized to fit within the margins. They may be created from
PowerPoint slides, Excel spreadsheets and screenshots. When the image is inserted into Word
right click on the image. Select Wrap Text. Try Top and Bottom or Tight to move and place
the text and image appropriately in the document. Always grab and drag a corner of the image to
resize and maintain aspect ratio.
PowerPoint Slides
Sometimes it is easiest to create content on a slide and save the slide as an image file [TIFF is
preferred]. Insert the TIF file into the Word document.
1. Select Design on the menu. Select Slide Size > Custom Slide Size. On the Mac select
Page Setup.
2. See illustration for slide size. Note that the slide accounts for the 1” margins. Adjust
image size in the slide or resize the image later in Word.
3. After adding content to the slide, on Windows select File > Save As filename.tif
On the Mac select File > Export >filename.TIFF
IMC
Innovate Make Create
https://library.albany.edu/imc/
518 442-3607
Page 2 of 4
Excel Spreadsheet
1. Highlight the data in Excel and select copy.
2. Go to Word and select Paste. The spreadsheet is a table in Word [see next].
Tables
If the table is more than one page each page should include a
header.
1. Select the table to display the Table Tools > Layout menu
2. Highlight the row[s] of text to repeat on every page
3. Select Layout >Repeat Header Rows
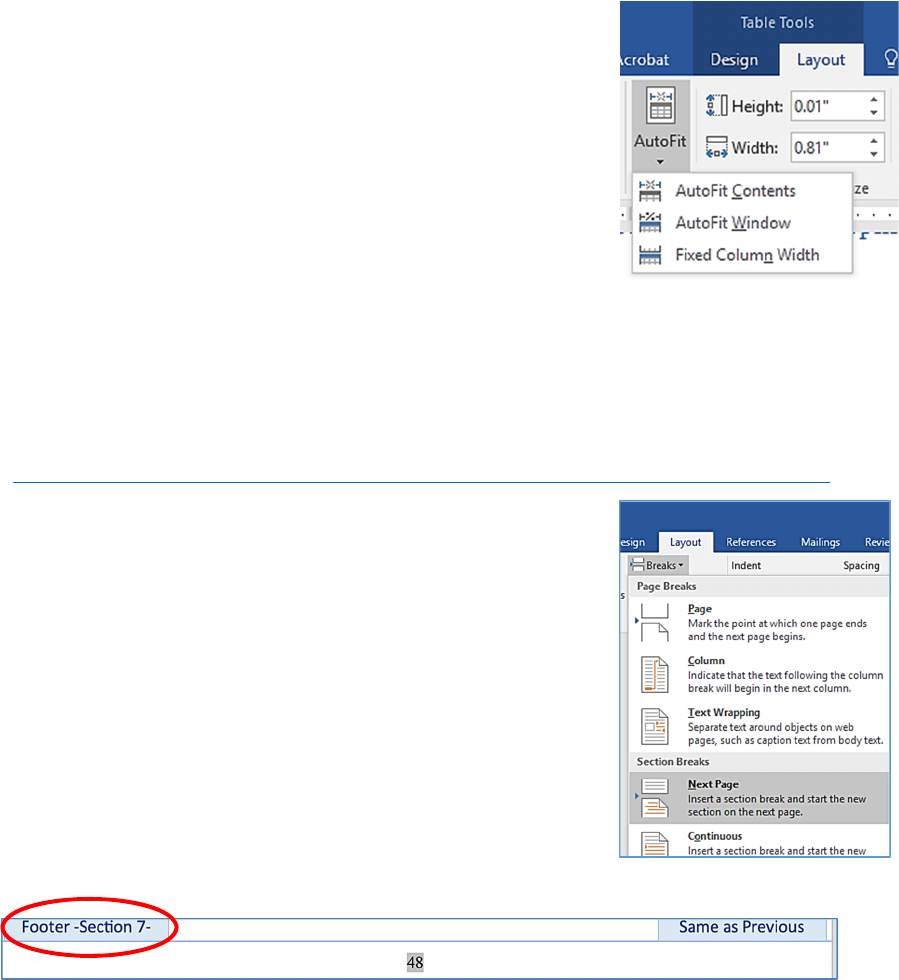
Tables may be resized to fit or to fill the width of the document.
Confirm your margins are 1 inch before you begin. Select the table
to display the Table Tools Layout menu. Select AutoFit. Select
an option, starting with Autofit Window.
Create landscape pages to accommodate wide tables
Tables are frequently best displayed on landscape pages; they may be too wide to fit across the
portrait page. Insert section breaks to change the orientation of pages to landscape. Section
breaks separate the pages and then just some of the pages are rotated to landscape mode.
If you have not added page numbers to the document, follow this handout to add page numbers
now: https://library.albany.edu/imc/tutorials_handouts/Dissertationpageformat.pdf
To create landscape pages, apply section breaks
1. Place your cursor at the end of the text [not the footnote] of
the preceding page. Select Layout > Breaks >Next Page.
You may need to press delete to bring the text to the top of
the page.
2. Place your cursor before the text of the next portrait page.
Select Layout > Breaks >Next Page. You may need to press
delete to bring the text to the top of the page.
If you double click in the footer area, and browse through the
pages, you will see different section numbers.
3. To apply landscape orientation, click in the first or only page in the section. Select Layout >
Orientation > Landscape.
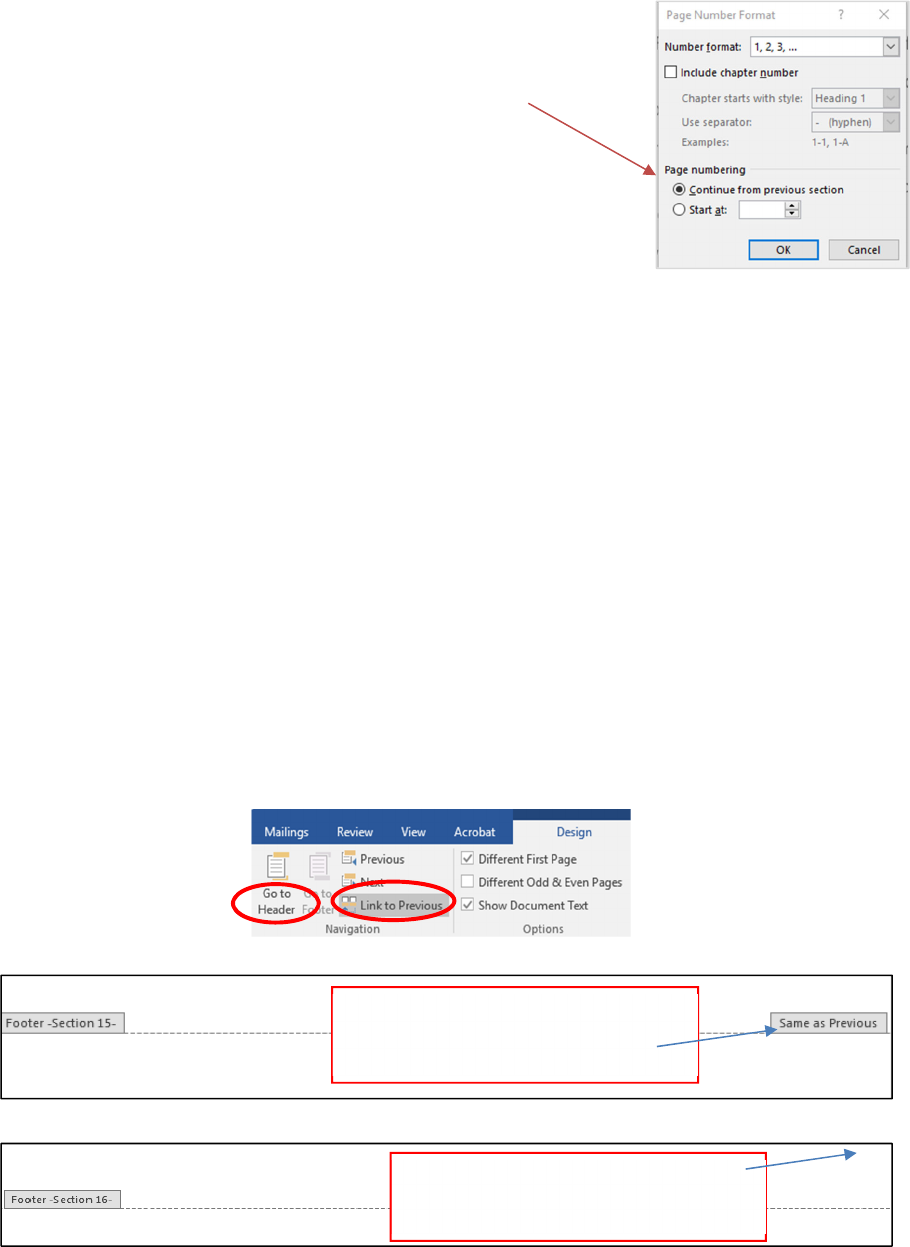
4. Review the page numbers. The page numbers should continue and not start at page 1 every
time there is a new section break.
Page 3 of 4
If the pages start at page 1 at every section break, double click
on the number 1 to select it. Right click and select
Format Page Numbers. On the Mac select Page Number >
Format Page Numbers
Select Continue from previous section.
Create Proper Page Number Formats on Landscape pages
When landscape pages are rotated to portrait mode it causes the page numbers to display on the
side not the bottom of the page. The page number must be moved to the left margin on landscape
pages. Then, when the landscape pages are rotated counter-clock wise, 90 degrees, to portrait
mode, the page numbers will be on the bottom of the pages. Instructions are based on
information found by the Graduate School.
1. Unlink and separate landscape pages from portrait pages
This will disconnect the Footers and Headers of the landscape pages from following the
format of the portrait pages.
Double click in the Footer of the landscape page. On the ribbon, unselect Link to Previous.
Select Go to Header on the ribbon; unselect Link to Previous.
Delete the page number on the landscape page.
Repeat these steps each time the page orientation changes
AFTER: No message indicates the footer
on this page does not match the previous
page; Link to Previous is not selected.
BEFORE: Indicates the footer on this
page matches the previous page; Link to
Previous is highlighted
Page 4 of 4
Add page numbers on landscape pages
Windows:
Select the landscape page. Select Insert > Page
Number. Select Page Margins > Large left; the
number appears in the left margin. Highlight the number
and apply the appropriate font.
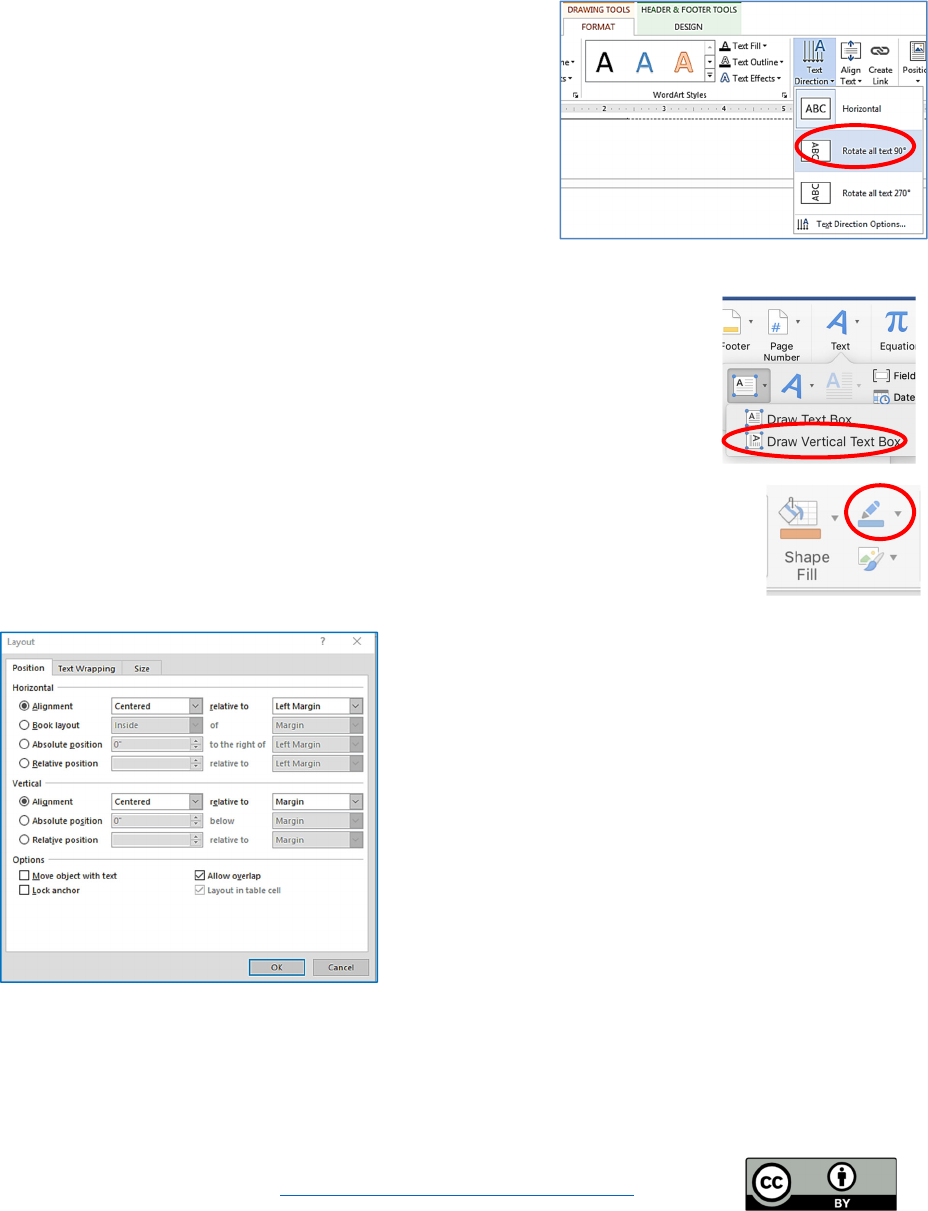
Highlight the number. Click on the Drawing Tools tab.
Click on Text Direction > Rotate all text 90
o
. Resize
the text box to fit close to the page number.
Mac:
Select the landscape page. Select Insert > Text Box > Draw Vertical
Text Box. In the left margin, draw a textbox large enough to fit the page
number and enter the page number. You must enter the page number in
the left margin on each landscape page! Adjust the font if necessary and
resize the text box to fit close to the page number.
To remove the border around the number right click on the border. The Shape
Format Ribbon displays. Click on the drop-down arrow Shape Outline and
select No Outline.
2. Center the page numbers
Right click on the text box and select More Layout
Options
Position tab:
Horizontal Alignment:
Centered relative to Left Margin
Vertical Alignment:
Centered relative to Margin
HINT: If you have difficulty selecting the page number
double click the footer area at the bottom of the page.
This allows you to access the page number on the left.
3.
If portrait pages follow landscape pages, review numbering. Confirm that the first portrait
page is not “linked to previous”. Add the page number if necessary. Select Arabic numbers
and continue page numbering.
Written by Regina Testa, Head IMC, Innovate Make Create Center; 6/17; 12/17;1/2020;4/2020; 9/2020; 3/2021.
This work is licensed under the Creative Commons Attribution 4.0 International License.
To view a copy of this license, visit https://creativecommons.org/licenses/by/4.0
