PC Word 2010/2007 Formatting Tables | Page 1 of 9
How to Format Tables in the American University
Thesis and Dissertation Template
Click to Jump to a Topic
Pasting Tables into the Template (3 Steps)
Creating and Formatting a Table from Scratch (12 Steps)
Formatting Table Notes
Pasting Tables into the Template (3 Steps)
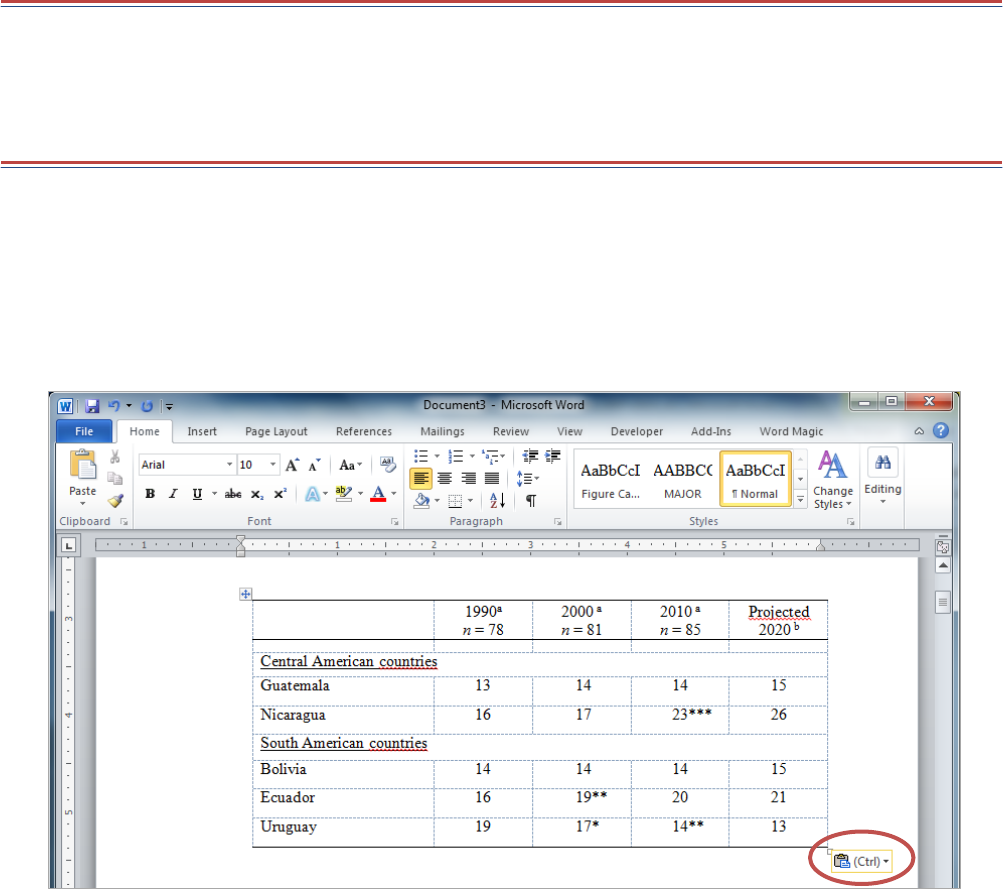
STEP 1. If you already have tables made in Excel or another Word document, you can highlight them, copy them,
and paste them into your thesis or dissertation document. After pasting, you will see a little clipboard appear at
the bottom right of the pasted material. Open them and experiment with the different options to see which
gives you the best results. You may still have to do some formatting afterwards. Make sure you consult your
discipline’s preferred style guide for details on border lines, spacing, data alignment, capitalization, and so forth.
If you are pasting from Excel and want to paste your table as an image, you should turn off the gridlines first in
Excel (go to View and uncheck the box that says “Gridlines”). Pasting as an image is sometimes helpful for large
appendix tables, assuming your formatting is clean in the original document.
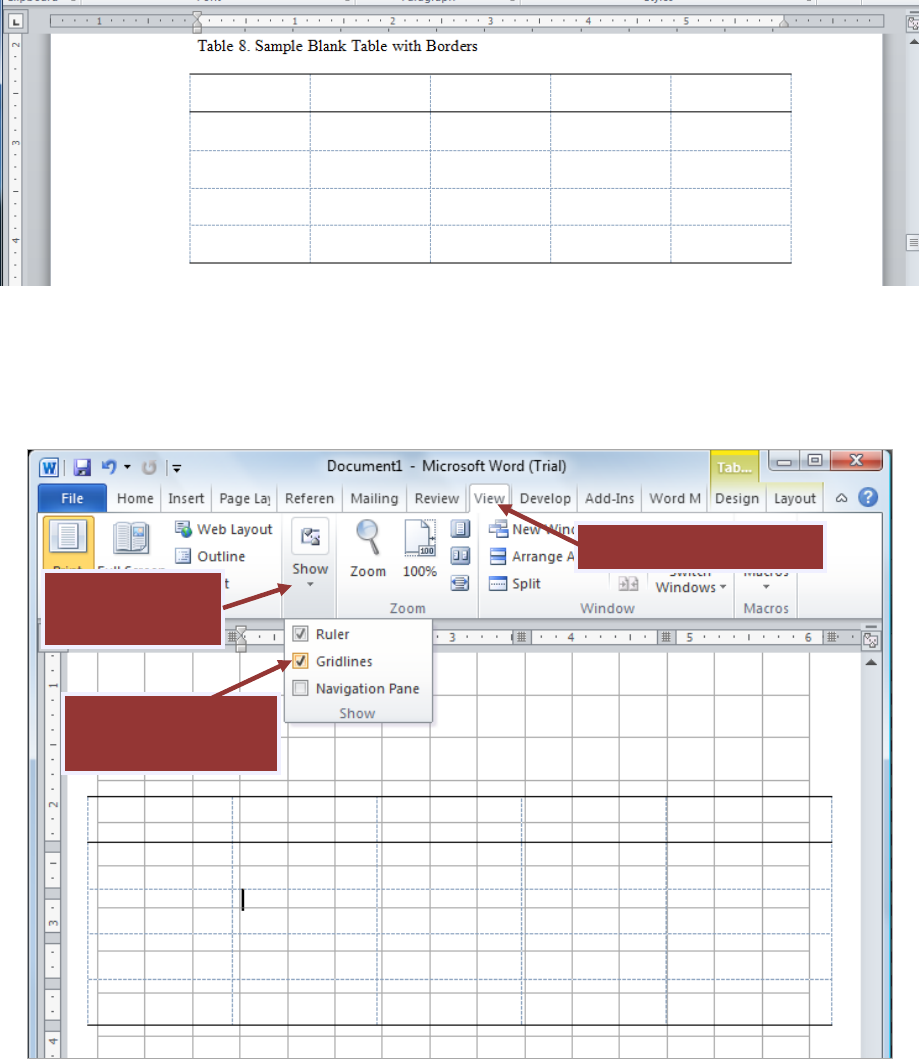
STEP 2. Check to make sure your table is within the allowable margin area by turning on the page gridlines (go to
the View Tab, then check the box that says Gridlines toward the left of the screen. If the box is not visible, click
Show within the View tab and then check the box that says Gridlines).
STEP 3. Check your discipline’s preferred style guide (Turabian, APA, etc.) and make adjustments as necessary.
PC Word 2010/2007 Formatting Tables | Page 2 of 9
Creating and Formatting a Table from Scratch (11 Steps)
The following formatting shows the basic formatting shared by both Turabian and APA tables. Please see those
guides or your department’s preferred style guide for details and requirements specific to your discipline.
STEP 1. It is not recommended to type rows of data into the main text and use the TAB key to create spaces. This
makes the tables very difficult to format and often causes misrepresentations of the data. You can insert a table
as follows:
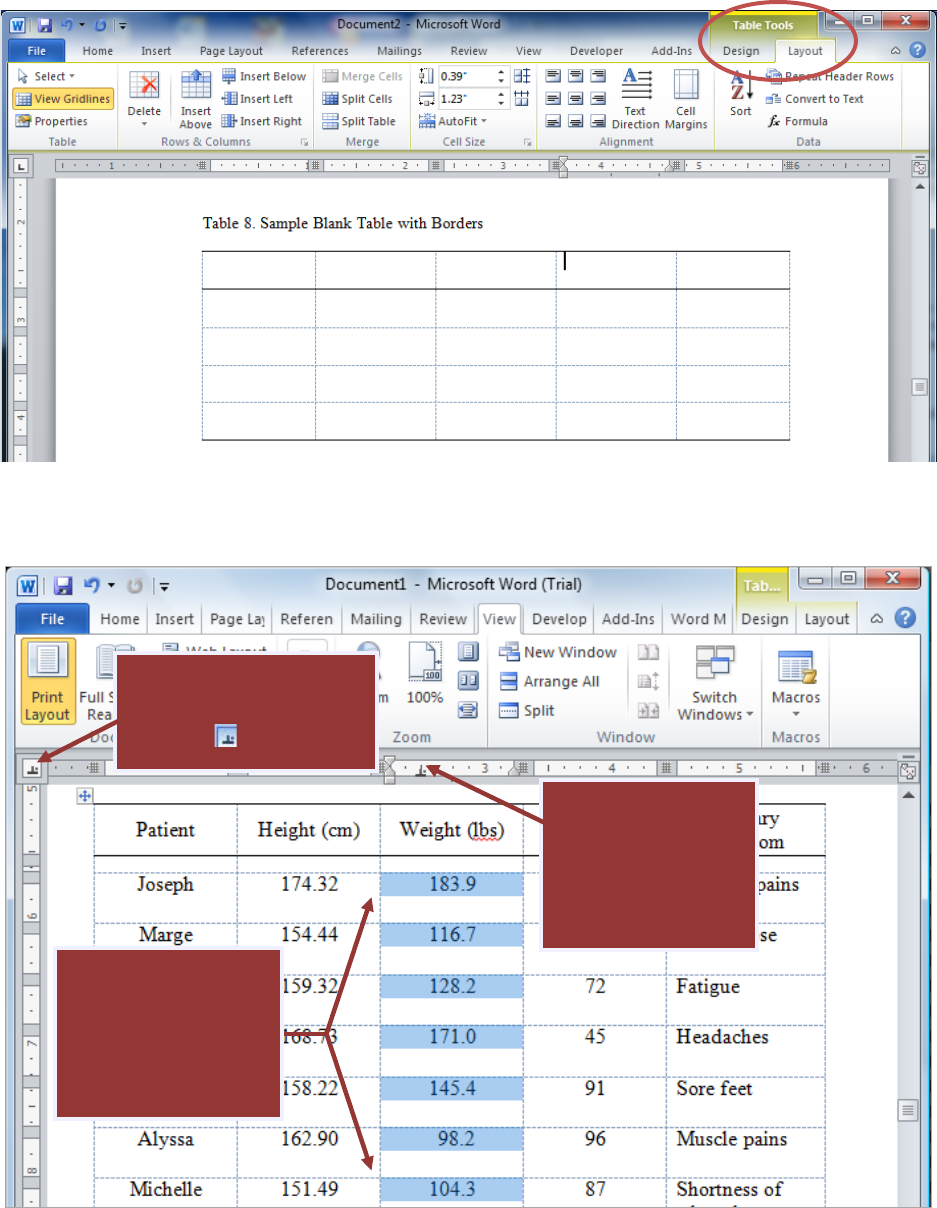
STEP 2. Turn on the Table Gridlines (not the Page Gridlines).
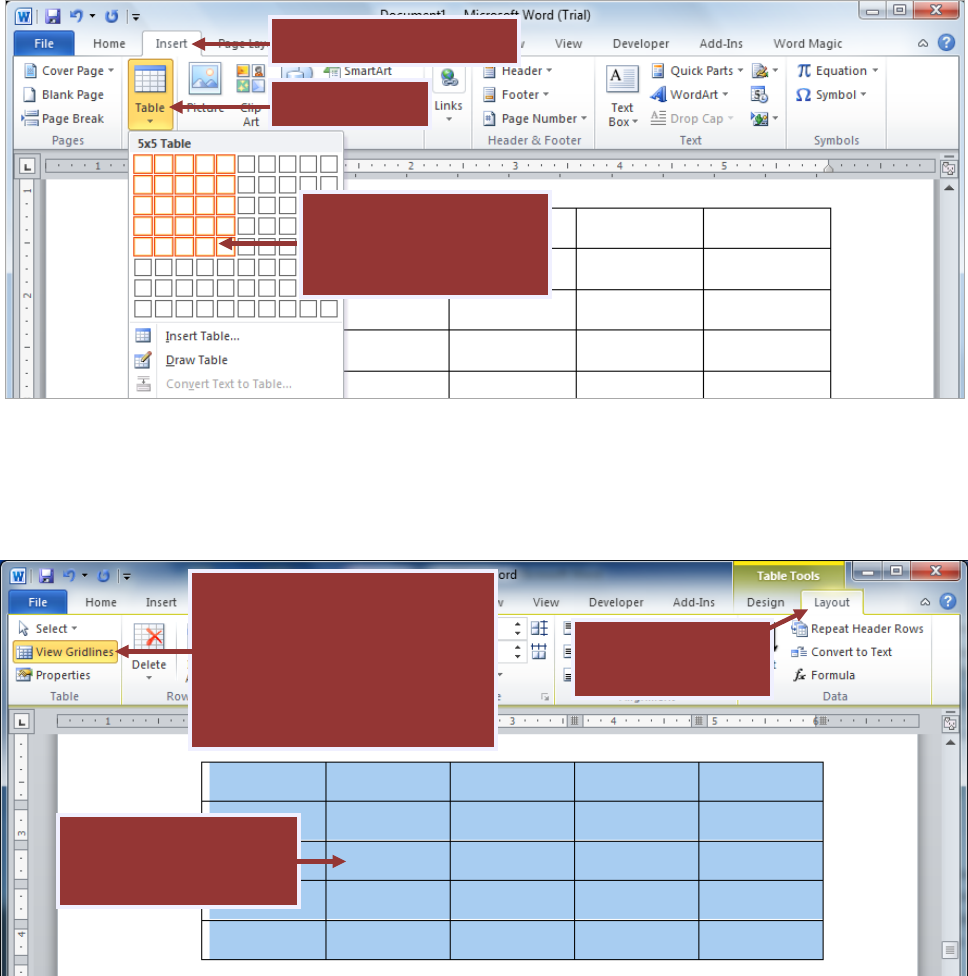
1. Click the Insert tab.
2. Click Table.
3. Choose table size
(you can add more
rows or columns later).
1. Put the cursor
anywhere inside any
table in the document.
2. Open the Table
Layout tab.
3. Select View Gridlines. You
won’t notice a change at the
moment because all cells are
covered in border lines, but
you will need the gridlines in
the next step.
PC Word 2010/2007 Formatting Tables | Page 3 of 9
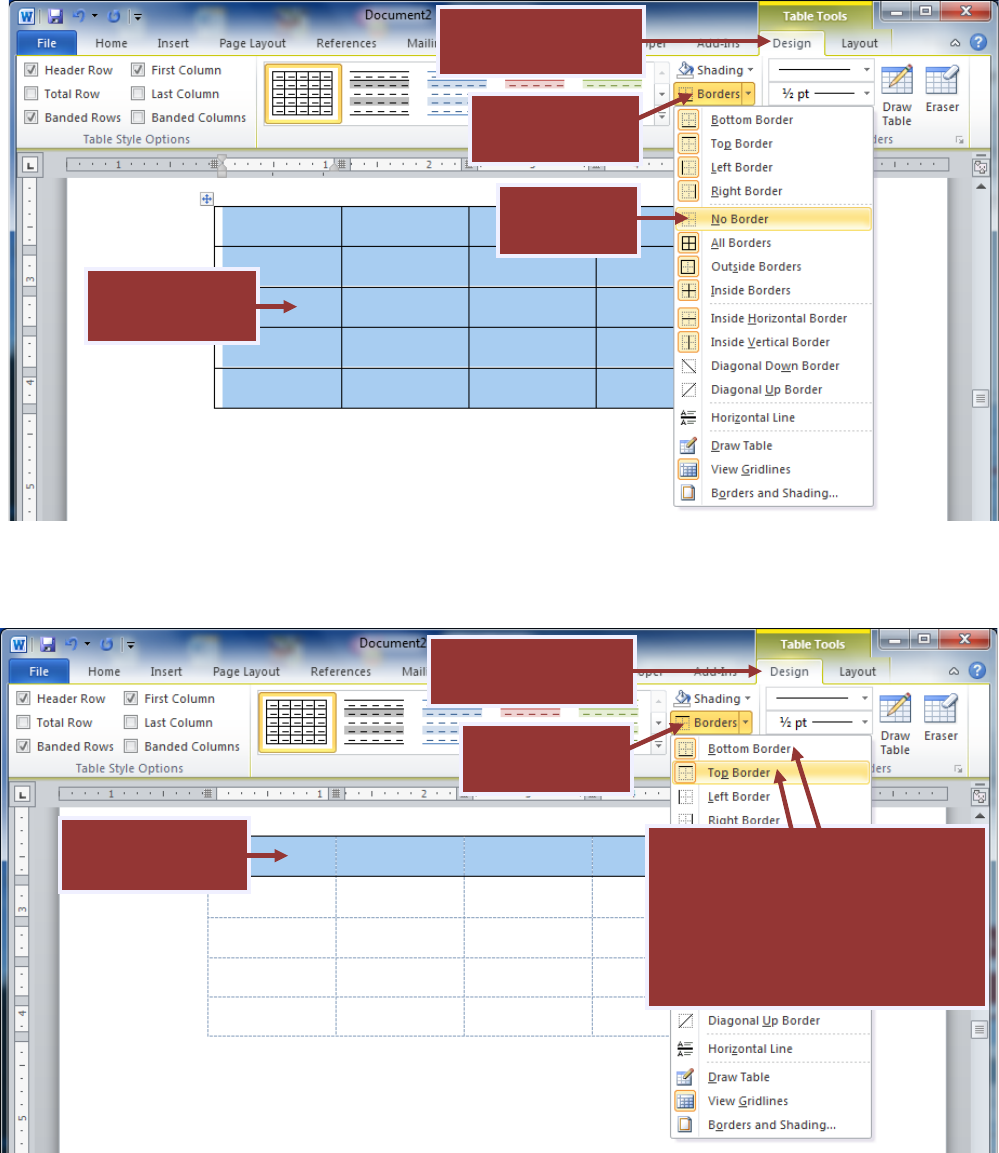
STEP 3. Remove all border lines from the table.
STEP 4. Add a top and bottom border to the first row.
1. Highlight the
entire table.
2. Open the Table
Design tab.
3. Open the
Borders menu.
4. Choose
No Border.
1. Highlight just
the top row.
2. Open the Table
Design tab.
3. Open the
Borders menu.
4. Choose Bottom Border, then
repeat Steps 2 and 3 and choose
Top Border. You should now
have two black lines, one at the
top and one at the bottom of the
top row of the table.
PC Word 2010/2007 Formatting Tables | Page 4 of 9
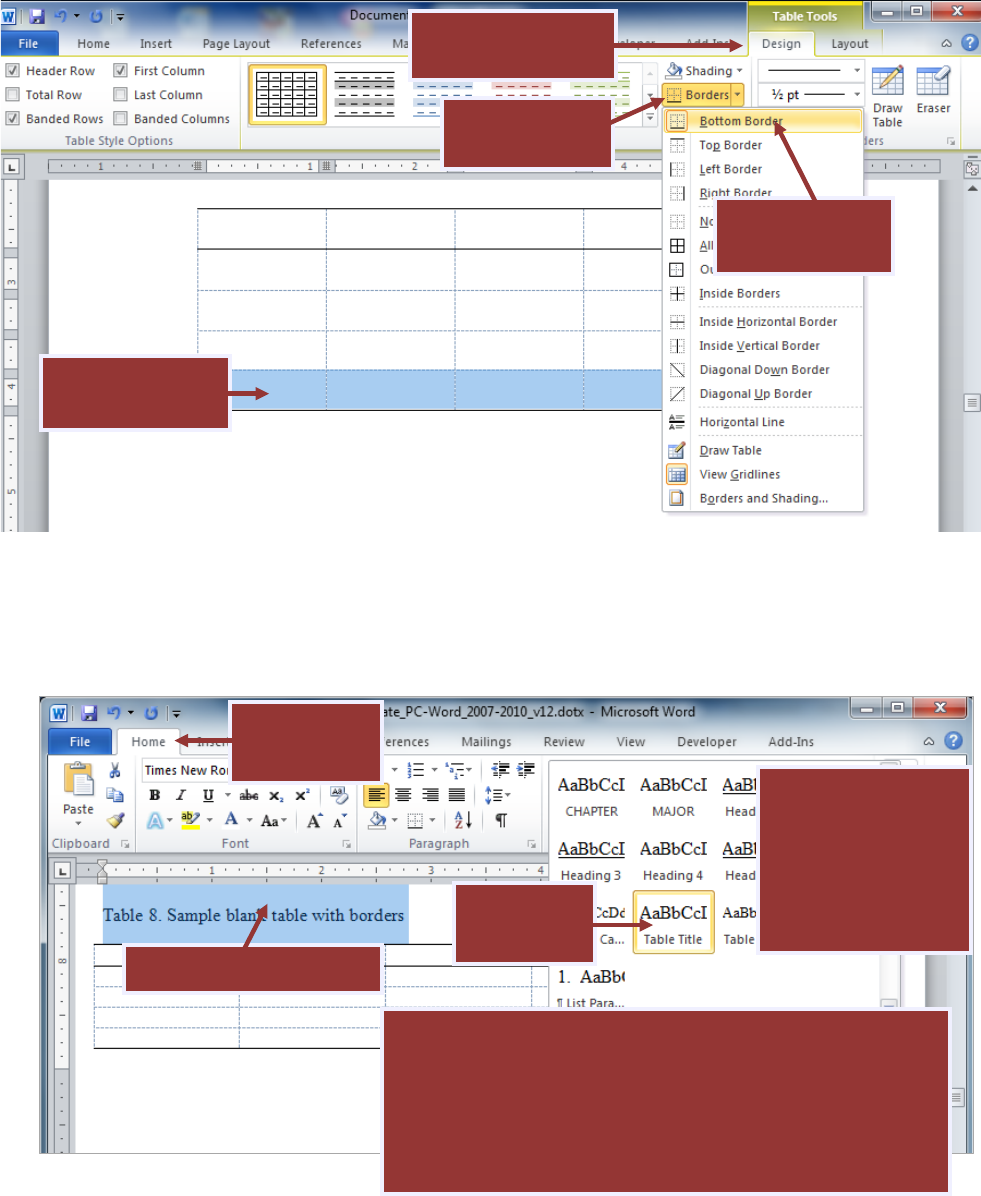
STEP 5. Add a bottom border to the table.
STEP 6. Add a table title. Consult your discipline’s preferred style guide for how to format the table number and
title and how to capitalize and punctuate appropriately. Highlight the table title and choose Table Title from the
styles boxes in the Home tab. This will ensure that the table title appears in the List of Tables.
5. Now, consult your department’s preferred style guide
(Turabian, APA, etc.) and add italics, line spacing, etc. as
needed to your table title. If you add line spaces between
the table number and table title, press SHIFT + ENTER to
use soft carriage returns (this keeps the table number and
title together in the List of Tables).
1. Highlight table title.
4. Choose
Table Title.
3. Open the Styles
menu by clicking
the second down
arrow to the right
of the white boxes
(not shown).
1. Highlight just
the bottom row.
2. Open the Table
Design tab.
3. Open the
Borders menu.
4. Choose
Bottom Border.
2. Open the
Home tab.
PC Word 2010/2007 Formatting Tables | Page 5 of 9
Your table should now look something like this:
STEP 7. Your basic table is almost ready for data entry. By default, the table will be outside the left and right
margins of the document. To see where the allowable margin area is, first activate the page gridlines (these are
different from the table gridlines).
1. Click the View tab.
2. Click Show (if
necessary).
3. Check the box
that says Gridlines.

PC Word 2010/2007 Formatting Tables | Page 6 of 9
STEP 8. Drag the right and left table borders in to be even or within the page borders (see image below).
Your table should now be lined up with the page margins, like this:
Now, you will probably want to turn off the page gridlines (but leave the Table gridlines) to avoid having so
many crisscrossing lines on the screen while you work.
1. Drag the leftmost table
line to the right, even
with the gray gridded line
that marks the beginning
of the printable area.
Then drag the right side
of the table to the left to
meet the other page
margin.
PC Word 2010/2007 Formatting Tables | Page 7 of 9
STEP 9. Now you are ready to enter your data into the table. Whenever you have the cursor inside of a table,
you can access a variety of table formatting options in the Table Layout and Design tabs.
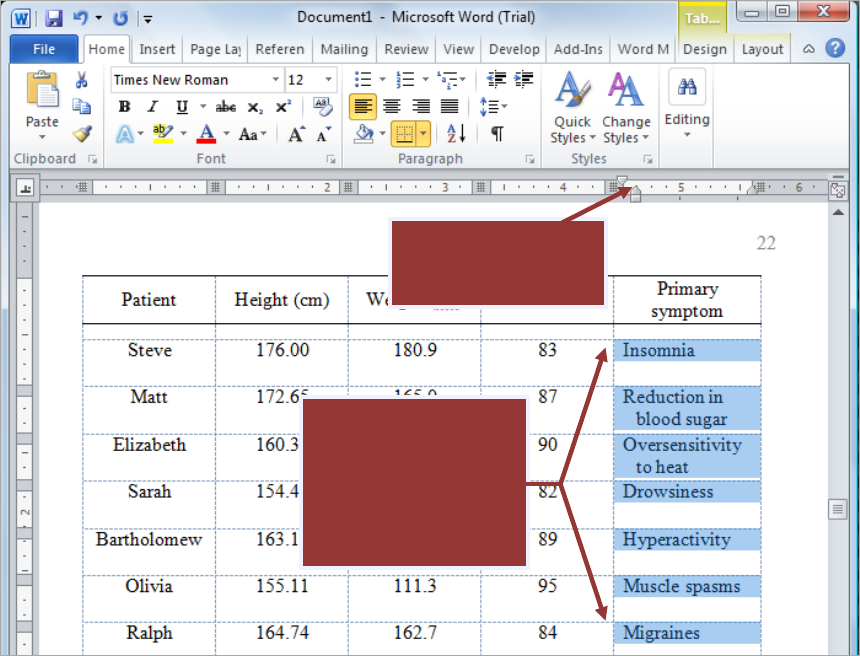
STEP 10 (if needed). If you have decimal data in your columns, both Turabian and APA require that you align the
cells vertically on the decimal point:
1. Click this little square
until the decimal tab
appears: .
3. Click one time on
the ruler to set the
decimal tab. Then
drag the tab left or
right as needed.
2. Highlight the
column data. Left-
align the data (Ctrl +
L on the keyboard or
from the Home tab).
PC Word 2010/2007 Formatting Tables | Page 8 of 9
STEP 11 (if needed). If you have word data that extends beyond one line in a cell, it often improves readability
to indent the second and following lines:
STEP 12. There are several other intricacies to properly formatting tables, such as aligning numerical and text
data, proper capitalization of headers and cells, abbreviations, table spanners, different types of table notes, etc.
For these issues and more, consult your discipline’s preferred style guide.
Formatting Table Notes
A Table Note style is included in the styles menu in the Home tab at the top of your screen.
First, add your notes according to your discipline’s preferred style guide (both Turabian and APA use very similar
styles for general table notes, specific notes, and probability notes, and Turabian includes additional information
on source notes).
Once you have followed your style guide’s rules, you can highlight the table note(s) and apply the Table Note
Style from the Styles menu in the Home tab to reduce the font size to 10 pt. If you decide to make changes to
the table-note font size or line spacing, you can do that to all table notes at once by modifying the style as
explained in the Customizing Your Headings section of the Heading Styles Instruction Guide.
1. Highlight the
column data. Left-
align the data (Ctrl +
L on the keyboard or
from the Home tab).
2. Drag the triangle
over a tick.

PC Word 2010/2007 Formatting Tables | Page 9 of 9
An example of general, specific, and probability notes in both APA and Turabian style is as follows, with the
exception that APA uses a period instead of a colon after the word Note in the general note.
Table 1. Table Title
Column heading Column heading Column heading Column heading
Row heading
An example of
word content.
0.73
11
Row heading
Example text
1.25
2,073
Row heading
Example text
13.22
459
Note: This is for general notes that apply to the whole table, statements that the table was adapted or reproduced from another
source (in that case include full citation), and sample sizes. Other notes appear in order as follows.
a
Superscripted letters are used for specific notes, which apply only to a column, row, or cell.
b
If you have more than one specific note, just keep going down the alphabet.
*p < .05 **p < .01 ***p < .001 (example of traditional format for significance note but modify as needed).
